
How to build a Commission model using DecisionRules Part III - Detailed implementation of rules and orchestration
In the previous articles, we have described the commission model, given an overview of its structure and examples of several commission rules for each of the proposed classes (Sales, Merit and Revenue commissions). In the final article of the series, we will focus on showing the practical implementation of the rules using the DecisionRules environment, their orchestration and setting up an external API call used to integrate the model into your own applications.


Implementation of Commission rules in DecisionRules
First, we will present several examples of how the rules are implemented with our tool. There are 3 options available for us to choose from when creating a new rule, Decision table, Decision Tree and a Scripting rule. Most rules in our model are designed in the form of decision trees which take the form of a logical structure IF(condition) THEN outcome if condition is met or ELSE outcome if condition is not met
Example of rule implementation
Commission rule examples
Previously, we have described how a typical commission rule will look and work (as an example we used the Loan Sale and New Client rules). Now we will take a bit more in-depth look at a select few parts of the implementation, to show how you might set up conditions to make custom outputs.
Most of the rules we have created for this showcase are in the form of a decision tree that evaluates the input conditions and sets the output accordingly.
These rules use a simple set of predefined operators and functions. Using just a simple set of operators means we can create rules that are easy to understand, support and change if necessary.
All the available operators and functions are described in the documentation with explanations and examples of use.
Both operators and functions can be combined in one rule depending on your need. An example can be seen in the Performing Loan commission rule
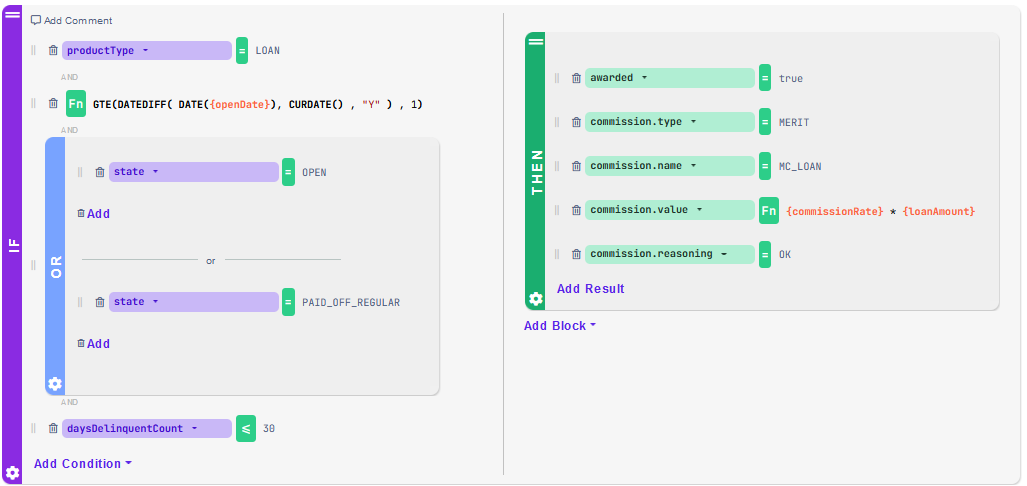
Here we use basic operators to check the values in the productType and daysDelinquentCount variables, and a function to check whether the openDate is at least a year in the past. You can see that we also make use of the OR block to allow two possible values for the input variable state. For the implementation of this particular condition you could also use the basic operator IN which would result in the same output.

The style of implementation depends on your preference and mainly upon which approach you find has better readability and is more easily manageable.
Using scripting rules
Most of the rules we create in DecisionRules can be expressed using the provided operators in either decision tables or trees. However, you might find yourself in a situation where these provided functions are not enough or result in a hard-to-read rule.
For these particular cases is one more rule type available called Scripting Rule. These allow you to use Javascript code to implement complex rules with advanced calculations. You can see an example of such a script in the implementation of the Loans Sold revenue commission. This commission checks all of the loans that the broker has signed and if the total surpasses a threshold, then a commission is awarded.
In the script you can use the input and output variables by accessing the objects input and output and then do any calculations that you need. The rule always ends with a return output command, which sends the output have set up to the caller.
If you have any questions regarding this script you can consult our documentation
Main orchestration rule
In the previous article, we have described the structure of our commission model by dividing it into 3 layers. Layers 2 and 3 are where you would make most of your modifications to create a commission model for your own use case (these layers contain the lists of rules in each class and the commission rules themselves). Layer 1 contains the orchestrating rule of the whole model, and it will not need any modifications unless you want to greatly change the functionality of the model.
The main orchestrating rule Calculate Commissions handles integration in both IN and OUT directions and is implemented as a Scripting rule. In our case, the rule is used to handle the input, evaluate all the required commission rules and then compile the output into the desired form. Unless you want to add an entirely new class of commissions to the model, you don’t need to change this script at all.
The script has a separate part for each of the commission classes and in each case it first calls the corresponding Commissions List table to get all the active commissions which are to be evaluated. Then it loops through all the deals in the input and checks the result of each commission rule in the selected class. When all the rules have been evaluated for all deals, then all the results are sent to the output in one array with additional information about the date of the evaluation and the broker.
The full code is available in the model in Calculate Commissions scripting rule.
Most of the computations in this orchestrating rule are done using regular JavaScript; the only exceptions are evaluations of other rules in your space. For this, you can use a DR package which provides a “solve” function to evaluate rules. The code can take this form:
First we need to specify the alias of the rule we want to evaluate (alternatively you can always use the ruleID, but the use of the alias makes the code much more readable; both are available Rule Setting of any rule) and then pass some data to its input.We then have the option to use several optional parameters, that allow us, for example to specify which version of the rule we want to use, which strategy we want to use to evaluate it or which parts of the output we want to extract. For more information about these settings, please take look in our documentation.
In the example above, you can see how we use this solve function to get a list of commission rules IDs. We evaluate a Sales Commissions list table that contains a list of all active commissions, therefore we do not need to use any input data. The “latest” parameter is one of the optional ones, and if you are always using the latest version of the rule, then it can be omitted.
Rule Design
Let’s now take a look at a few things that will make it easier for you to use the model and to change it to suit your needs:
Test Bench
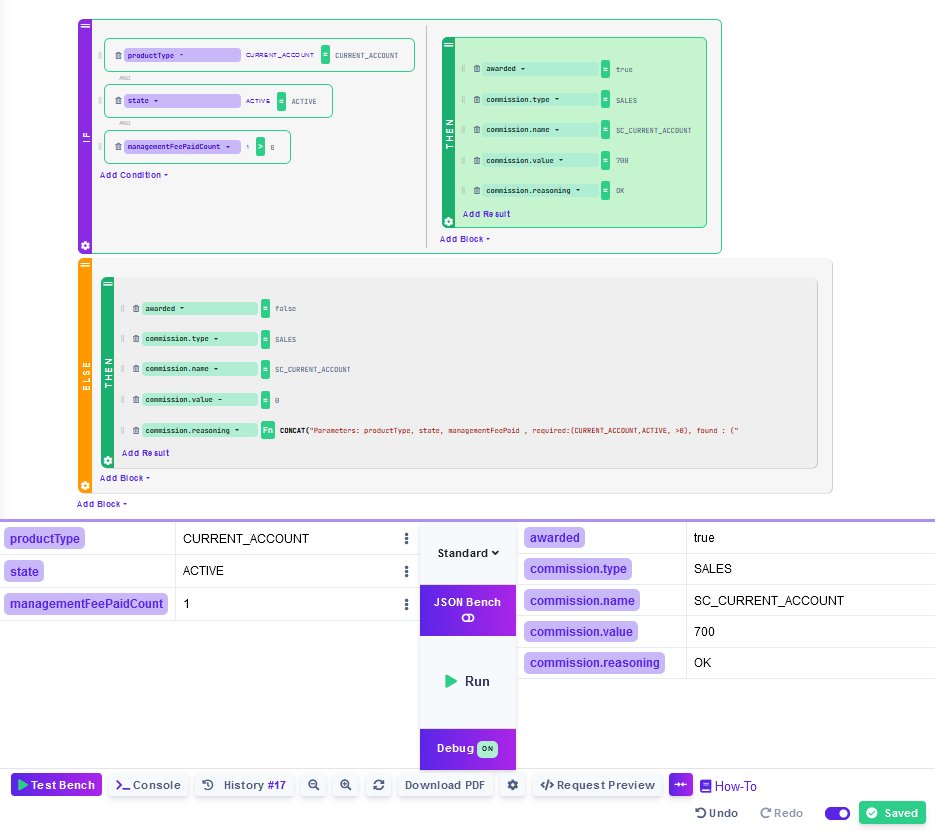
When testing or fine tuning the rules, you can use the Test Bench feature to visualize how the evaluation of the rule proceeds and to test and debug it. On the left side of the Test Bench you can set values for your input variables and then after pressing the Run button, you should see the output calculated on the right side. When the commission is awarded, the test results will look something like this (with the Debug setting on, the active blocks will be highlighted in green)
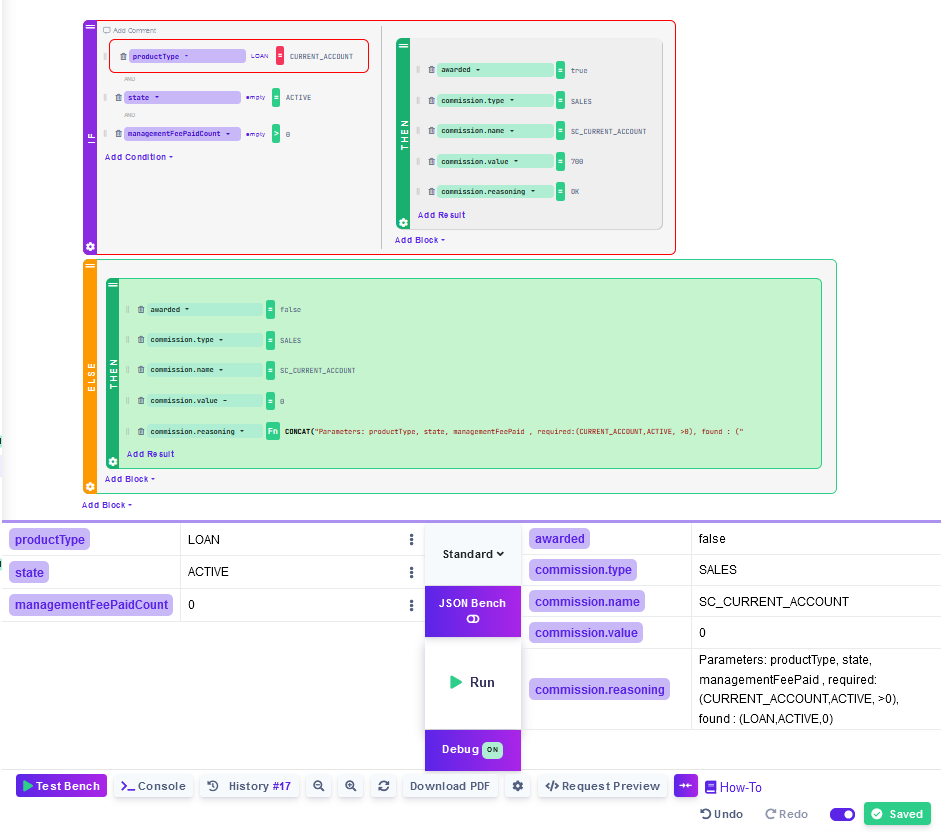
Another example shows what happens when the commission is not awarded (you can see the failed condition highlighted in red and the output message contains a list of the values from the input so that it is clear which conditions failed).
Template rules - Setting up a new commission rule
All of the management of commissions is done by way of the user interface. When setting up a new rule, there are templates prepared in the template folder of the project that already have the common output; the next steps taken to set the rule up are into
- Copy the rule into the particular folder and rename it to your desired name and fill out your unique rule alias
- fill in the necessary input model (our default structure is provided so if you are not adding new inputs, you can skip this step)
- define necessary rule variables
- set up the logic of the rule in your chosen format
- test the rule using the test bench feature
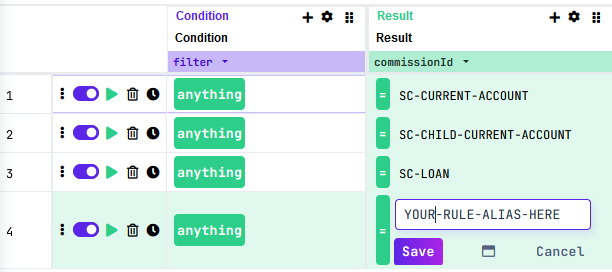
- add the rule to its corresponding list table (for example if you are creating new Sales commission, you need to add a new row to the Sales Commissions List table and fill out the rules alias in the comissionId column)
Integration
As we described in the previous article, the integration of DecisionRules into your own application can be done using REST API. We will use the Postman application to show how an API call would be created and structured.
Preparation
To successfully set up the API call we’re going to need several things:
- ID or Alias of the rule you want to evaluate
- Its input model
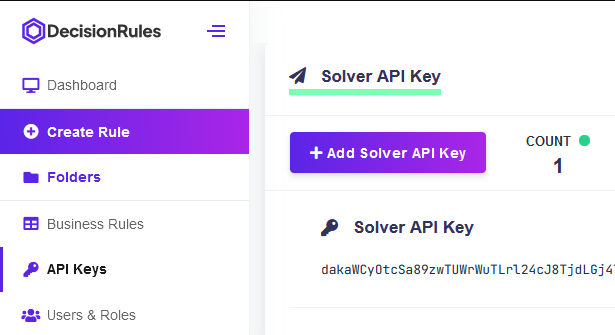
- Solver API Key of your DecisionRules space - The key can be found after choosing the API Keys option in the left-hand side menu
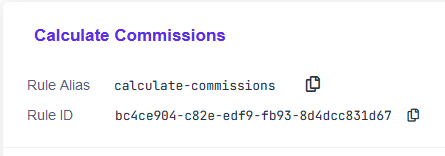
In our case, we want to call the main rule Calculate Commissions, for which we have set up an alias for ease of use
Now that we have everything we need we can start creating the call in Postman.
Setting up the API call in postman
To evaluate any rule created in DecisionRules we use the Rule Solver API (as explained in documentation). We will describe two ways to set up the call. The first one is letting the DecisionRules create the call for you , the second is setting up the call manually.
Creating the call using the Request Preview feature
If you open any rule in the DecisionRules, you will see in the bottom menu and option called Request Preview

This opens the following window, which contains a prepared API call, with several programming languages to choose from.
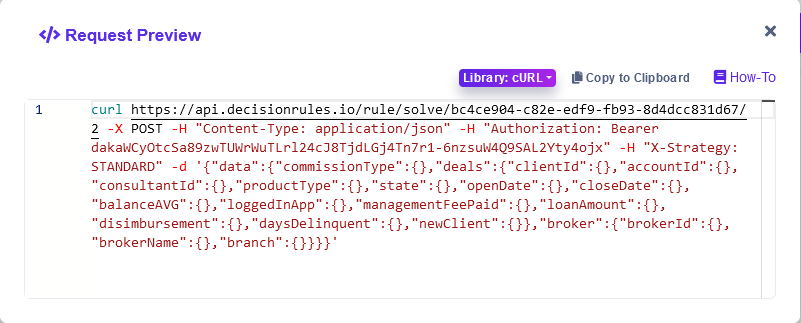
In our case, you can copy the cURL code and paste it straight into a new call in postman. All you need to change to have a functioning call is to provide your input data in the body.
Now let's take a look at what would you need to do to set up the call manually from scratch. This walkthrough will detail how to set up everything that is provided in the call created through Request Preview, allowing for wider variety of options (for example using the more readable rule alias instead of ruleId).
Creating the call manually
The endpoint we need to call to “solve” a rule is https://api.decisionrules.io/rule/solve/:ruleId/:version
The first page of the API call should look like this:
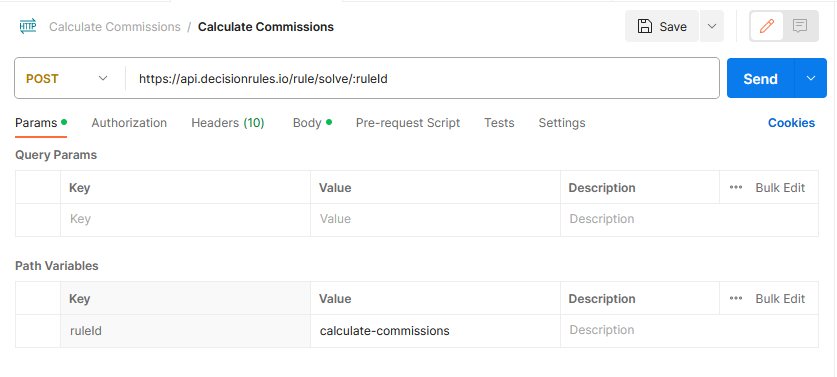
We have copied the endpoint into the address line and filled in the ruleId key with our rule alias. Notice that we have removed the :version parameter, as it is optional and if we only want to evaluate the latest version of the rule, it is not necessary.
Now we need to set up the headers, which is where we put our solver API key, which then acts as our “login and password”. All you need to do is head to the Headers tab and add a key of type Authentication with the value “Bearer <your API key here>”. It might look something like this:

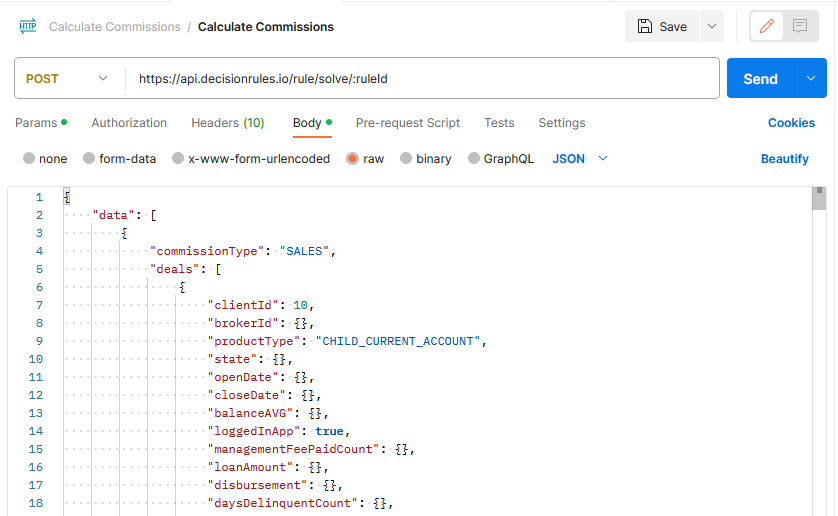
Last but not least, we need to give some input data to our call so that we have something to evaluate. This is done in the Body tab, where you tick the “raw” option, and from the dropdown you select “JSON” and then you can copy your input data into the space provided.
Please note, that your input data needs to be inside a predefined property called “data”
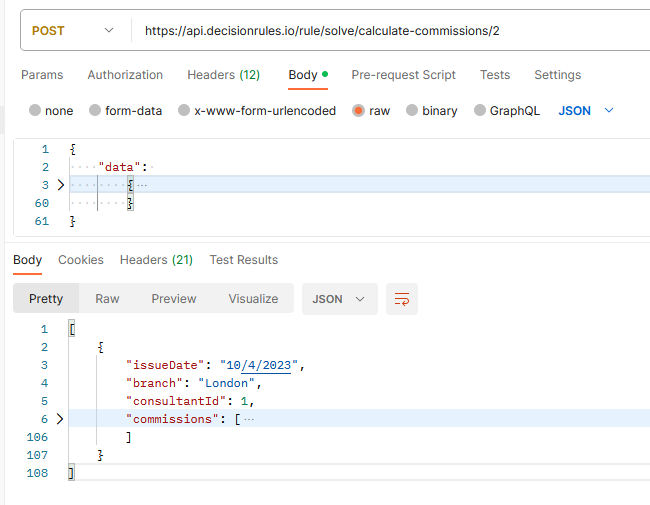
After you finish this the page should look like this:
Now you are ready to evaluate your rules using API Calls!
Postman will show the output of your call in a window under your call body.
Any call to the DecisionRules API will return its response in the form of an array. Even if you only send one object for evaluation, the response will be in the form of an array with one entry as you can see bellow:
Should you want to experiment or read more about the options that the API gives you, please consult the documentation.
Reporting in PowerBI
Let's take a look at how to process DecisionRules' Audit logs in Power BI to prepare the data for commission dashboards
Note: Please make sure you have Audit logs activated and switched on for your Calculate Commissions rule. How to set-up is described here https://docs.decisionrules.io/doc/business-intelligence/audit-logs
Audit logs can be accessed using the Business Intelligence API, this API uses a different API key than the one we used to evaluate the rules in Postman; you can find this key in the same API Keys menu under Business Intelligence API Key (if you don’t see any keys, you can add some using the Add business intelligence API key button).
Other than this, you will need the Rule ID of your Calculate Commissions rule (if the Rule ID isn’t used, the alias will not work!).
While loading the data through the Business Intelligence API, we will access the audit logs in multiple steps by loading a page with a limited number of logs each time. We need to take this approach so we do not overwhelm the server if we need to load a large number of logs in one go.
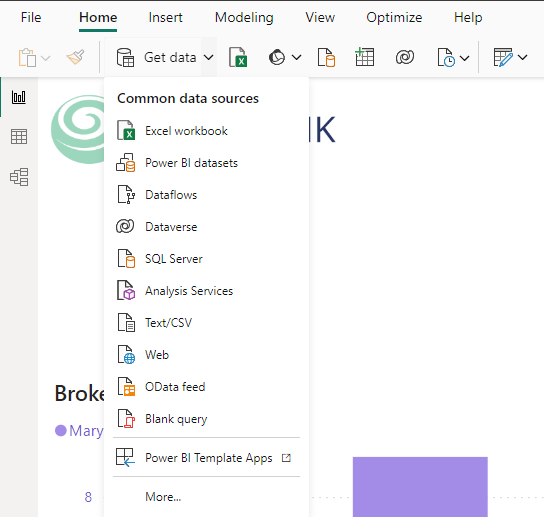
Now we can open PowerBI and create a query to import the data.After opening a new project, you should navigate into the Get Data dropdown and select “Blank query” (this will open the PowerQuery editor)
You will need to create two parameters using the Manage Parameters option in the Home ribbon, to name these parameters BI_API_KEY and RULE_ID and to set their current values to the values of API key and Rule ID which you received from DecisionRules.
PowerBi Query
Our PowerBI query can be divided into the following 5 parts:
Part 1
At first we query the DecisionRules Business intelligence API, and we extract a parameter matchedCount from the call (the call itself uses a limit=1 setting because we do not need any data yet).This parameter tells us, how many logs are there for us to load; we store it in the iterations variable.
Part 2
Here we prepare a function that reads one page of logs.
Part 3
Now we have a loop calling the function for all pages of logs (which hold the number of logs to load) and for each iteration, we call the function FnGetOnePage from the previous part, and we connect all the logs together into a single table
Parts 4 & 5
In these final parts, we transform the data from the audit log format, which might contain a lot of data that you might not find useful at this moment, to a table of only the output data we care about. Part 4 takes care of getting the rule output data from the log and should stay the same even if you decide to change the output structure. However, if you decide to do so, you will need to change the code in the last part, as we are dealing with column names which we get from the DecisionRules output and if you add or remove something, these names will need to be changed/amended.
You can see the complete code below; please copy and paste it into your PowerBI query.
Now you can Invoke the function, and you should have all the output data from your Audit Logs available in PowerBI and you can start setting up your reports.
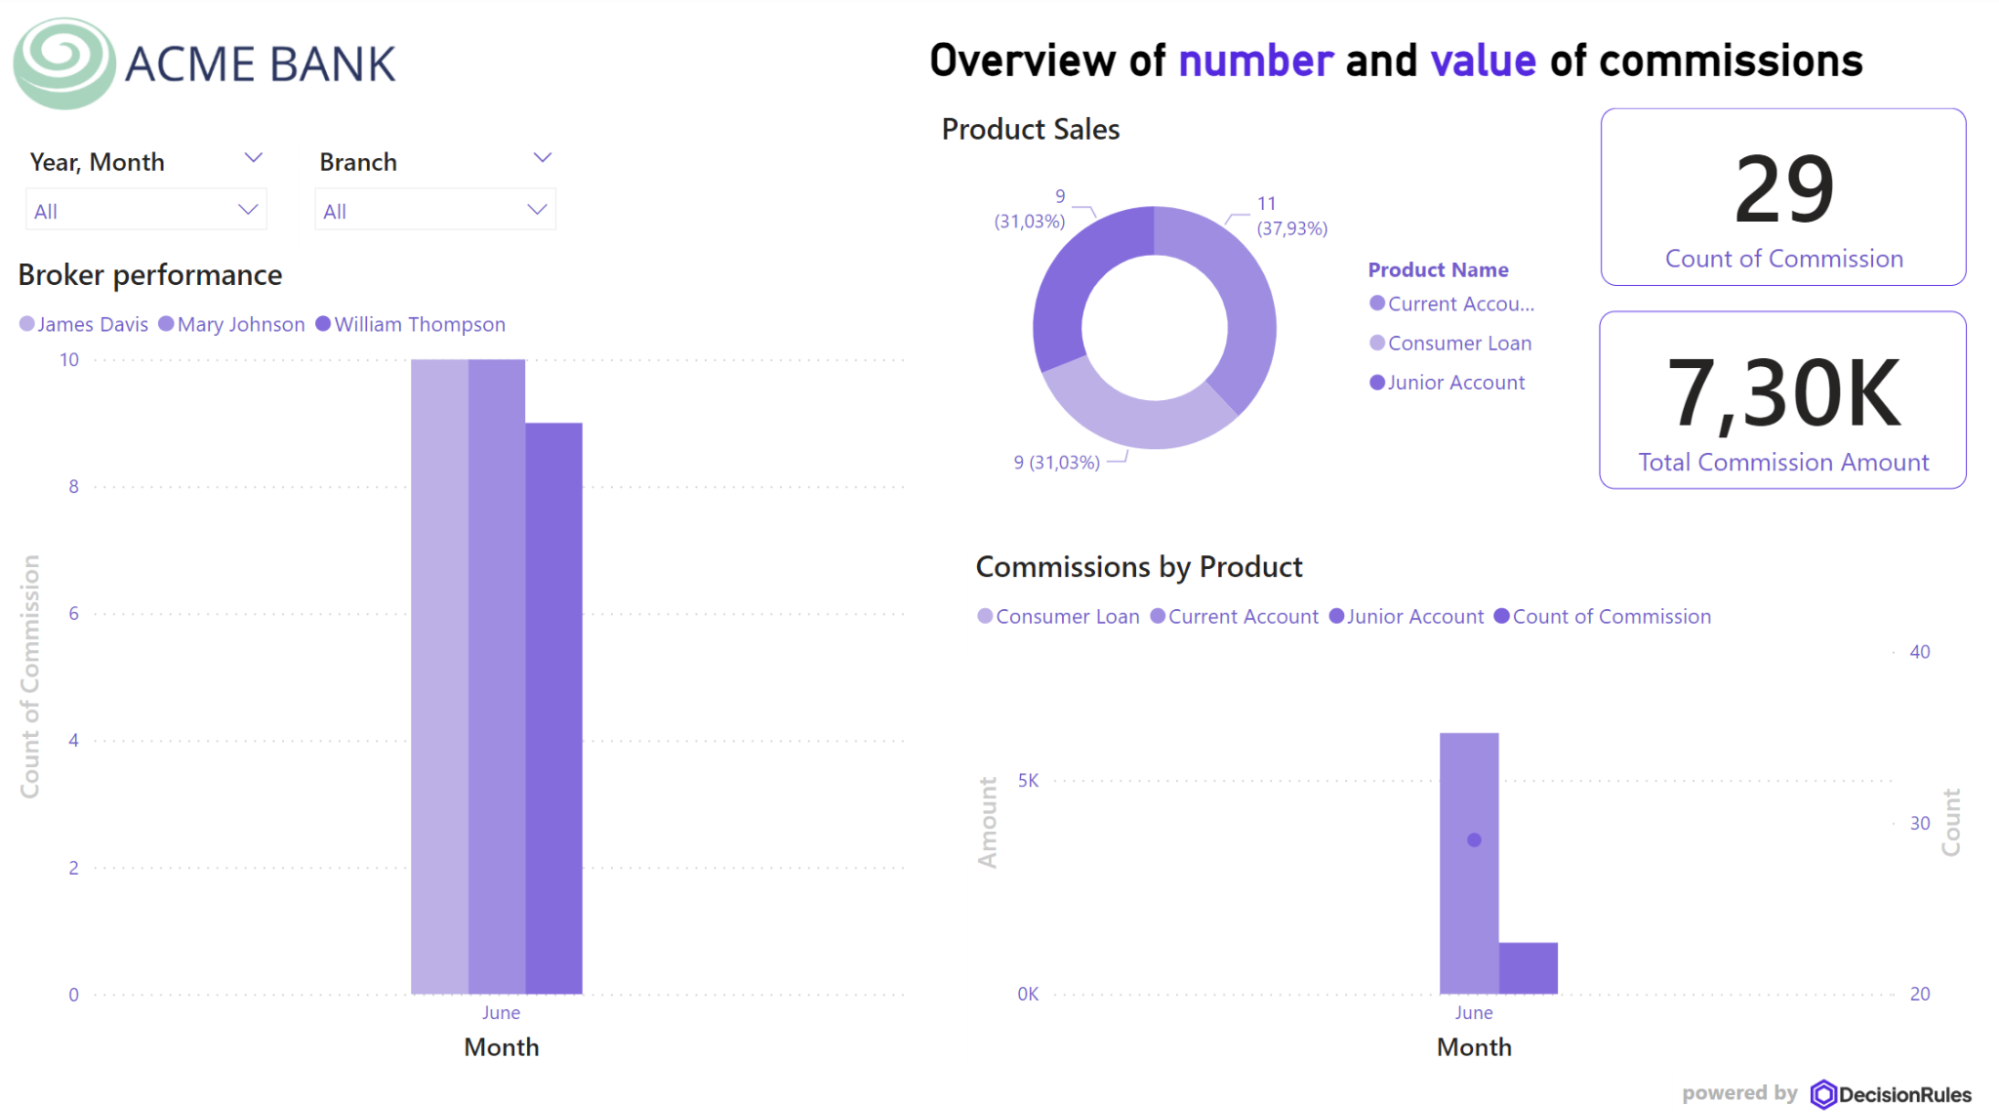
You can of course create the reports according to your own needs and specifications, but for the purposes of this showcase we have set up a simple dashboard as can be seen here:
Conclusion
In this article, we've demonstrated how to set up a commission model in the PowerBI tool. The rules are designed to be simple, to illustrate the logic and provide a direction to follow. Commission logic can be intricate, and this is only the first step.
If you wish to find out more about DecisionRules’ possibilities, the documentation is here for you. Dive in with confidence and explore further.


